You Butter My Toast
TKT's Toast-aly Punny Cutters
If you follow us on our social media accounts, you've probably heard of Cookie Cutter Kingdom. They make all of our custom 3D printed cutters (my father in law helps us out when I need something in a megarush). We found each other right when we were both starting out. I'm the loyal type and they are too so we formed a partnership and we've been together ever since. Over the last three years, we'd talked many times about doing a Tiny Kitchen Treats cookie cutter set, but like so many other girl bosses who are also moms, my days are long, but never long enough.
With our Brit + Co cookie class release, came the requests for our custom cutters. While you can absolutely print out the templates and hand cut cookies, it's time consuming and laborious. My student's requests were the push I needed to finally start on designing our first ever cookie cutter set.
I knew I wanted to do one of the cookies from the class, but I also wanted to tie it into a theme and make sure there weren't other cutters like them out there. And so I give you the cutest set of cookies I've ever seen. I know mother's always say that about their children, but have you ever seen anything so adorable?

Anyhow, I also wanted to include a guide to making them so you guys can follow along. Let me know if you have any questions in the comment section below.
Oh! And click here for a direct link to buy our very first cutters ever!
Happy Decorating!
Supplies
- Custom TKT Cutters* Toaster with toast, knife, butter stick on dish (optional 3” toast cutter)
- 11 Piping Bags* I like CCK tipless, because they are high quality and will not burst, but in a pinch you CAN use Ziploc bags and of course you can use piping bags with couplers or tipples with tips- use what you are comfortable with/what you’ve got!)
- Wilton Gel Food Coloring: teal, ivory, brown, black, pink, electric pink, yellow, white, grey
- Silver luster dust (please make sure you are using EDIBLE stuff!)
- Knife or offset spatula
- Small brush (used for food only)
- A small fan (or a big one)
- Spray Bottle
- Bowls & spoons
- Coffee mug, cup or glass
*Available at www.cookiecutterkingdom.com
Butter Knife
1. Outline knife sections in grey piping.
2. Fill every other section with grey flood.

3. Place under fan and wait at least 10 minutes so that a crust forms. We need that for dimension!
4. Now fill in remaining sections, place under fan again and set aside.
5. Allow to dry 6-7 hours*
6. Mix vodka and luster dust and paint on. The key here is a couple of light coats instead of one very heavy one.

7. Now add your “butter” with your yellow piping icing. Then, using a knife or offset spatula, shmear (that’s a word, right?) it around like you would on real butter.

Butter Stick & Dish
1. Using your white flood and yellow flood, outline all the sides of your lil butter stick and dish.
2. Ice every other side, alternating sections that don’t touch and waiting 10-15 minutes in between

3. Once complete, set aside and allow your cookie to dry for at least 4-5 hours.
4. With your black icing, pipe on eyes by adding black dots and immediately adding a tiny white glimmer.
5. Pipe a tiny mouth and a tiny cheek on each side with your pink pipingicing.
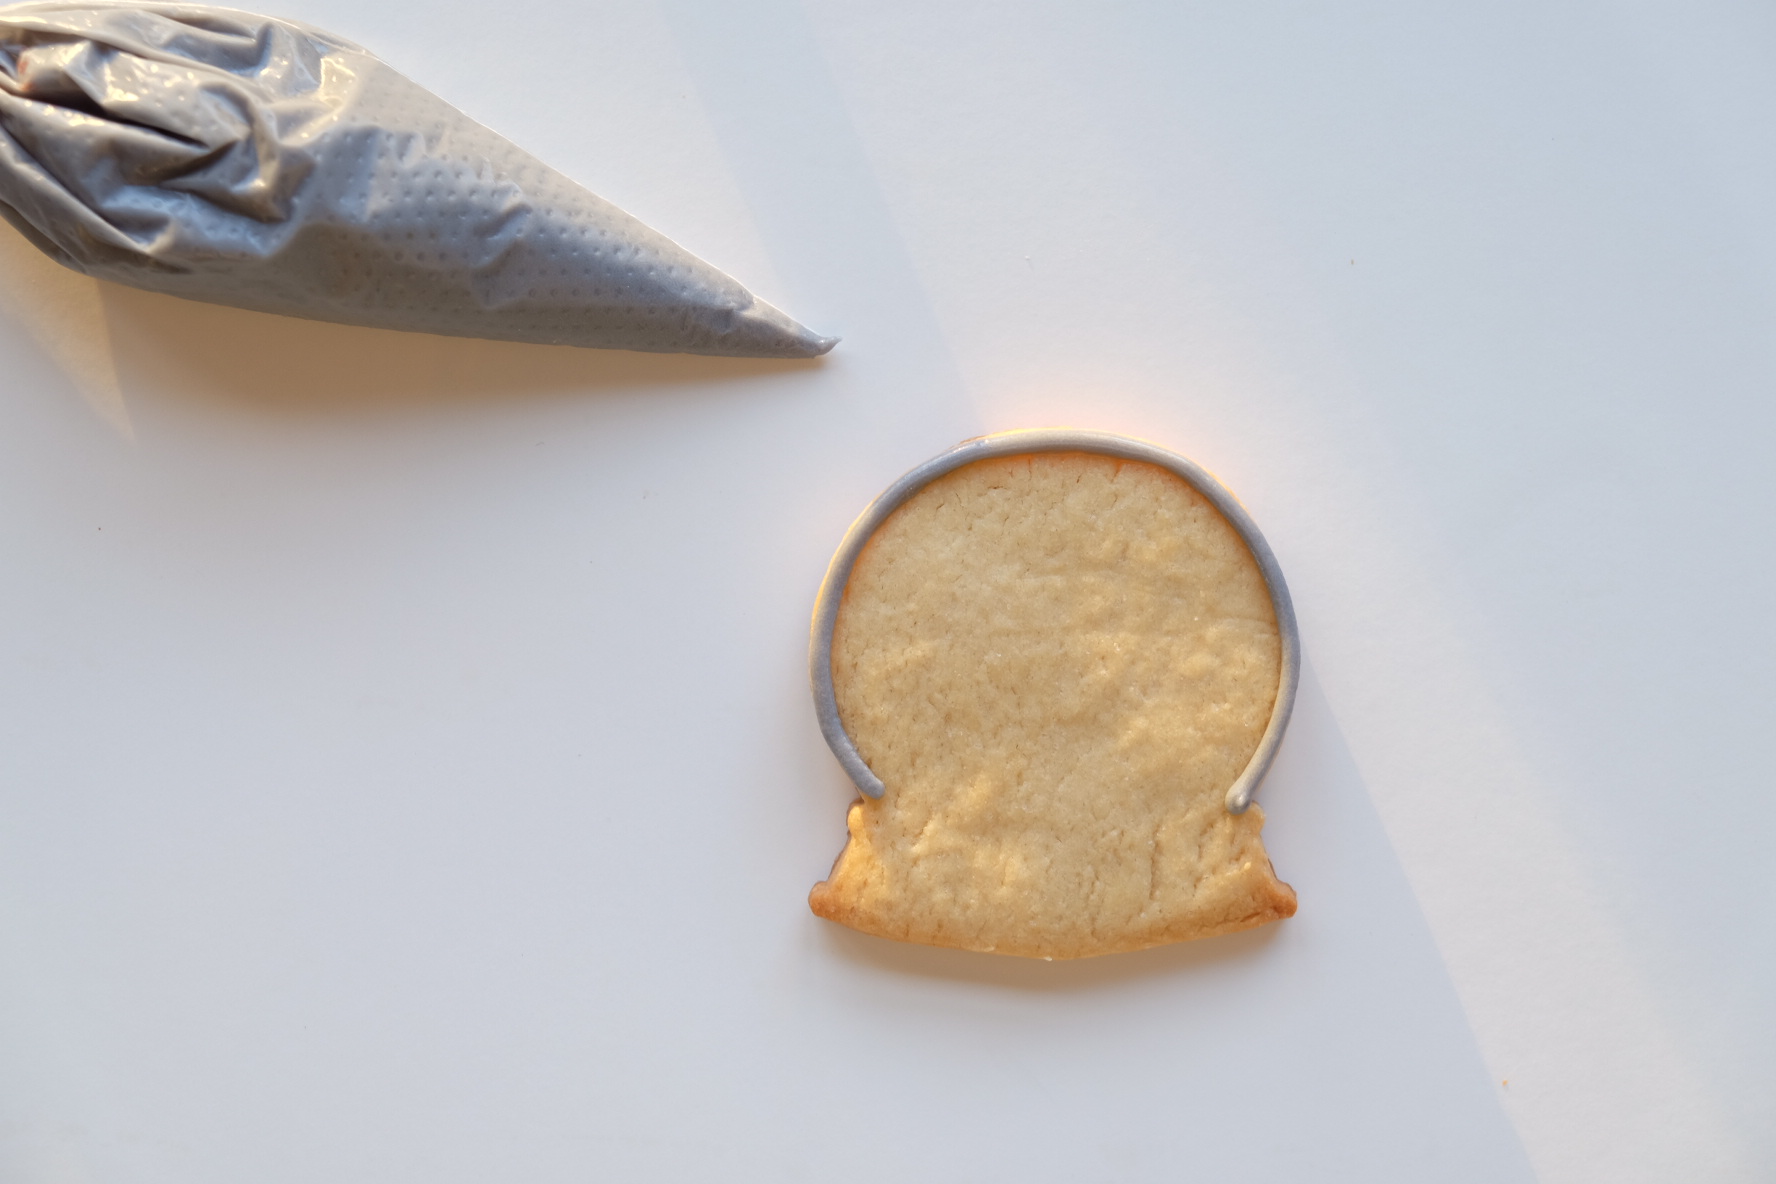
Toaster & Toast
1. With your teal icing, flood toaster “body” leaving a thin strip on bottom naked.

2. Then, using your brown piping, outline your toast’s “crust”

3. Set aside for 10-15 minutes.
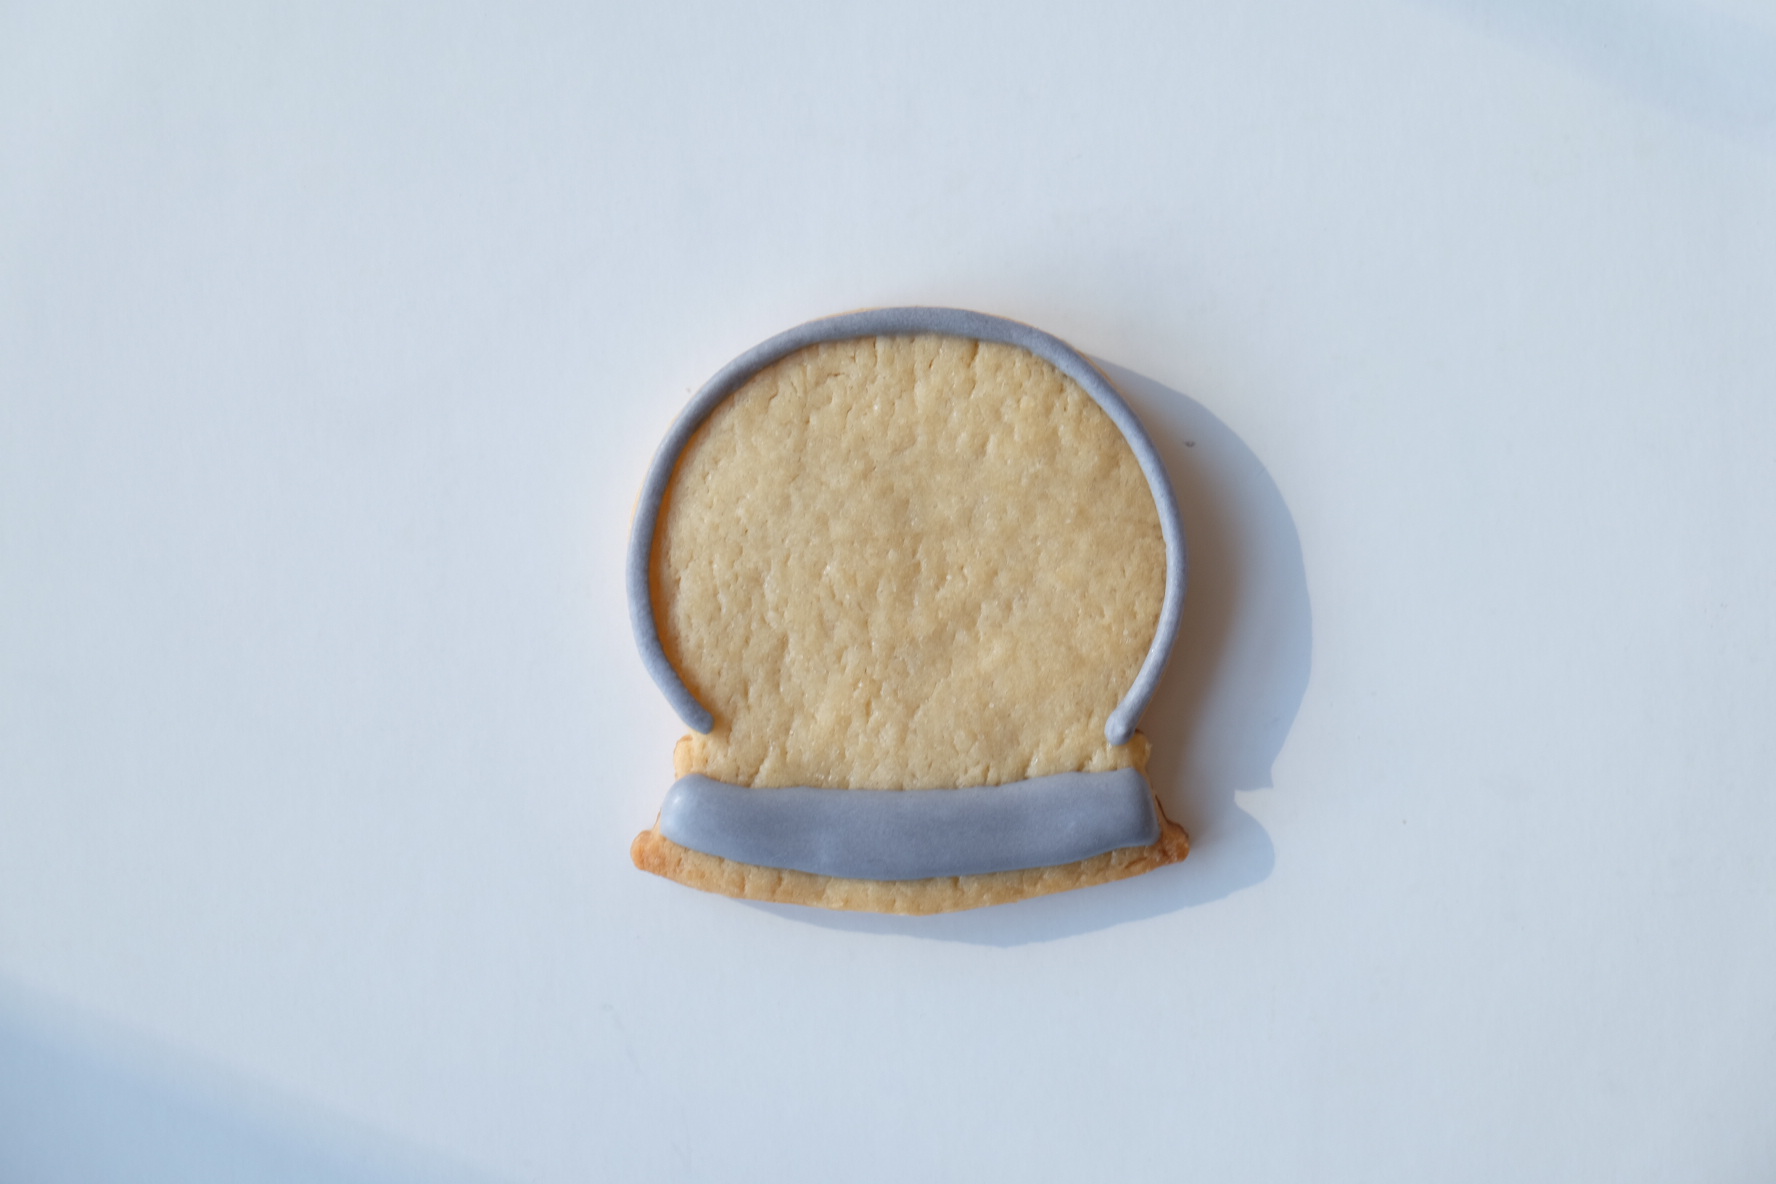
4. Flood your toast with light ivory icing.

5. Lay down a strip of grey piping at the bottom and add two “tracks” for your toaster sliders (I have no idea what this is called, but the picture says it all!)
6. Add knobs. I did silver then changed my mind to black, but do whatever makes you happy J
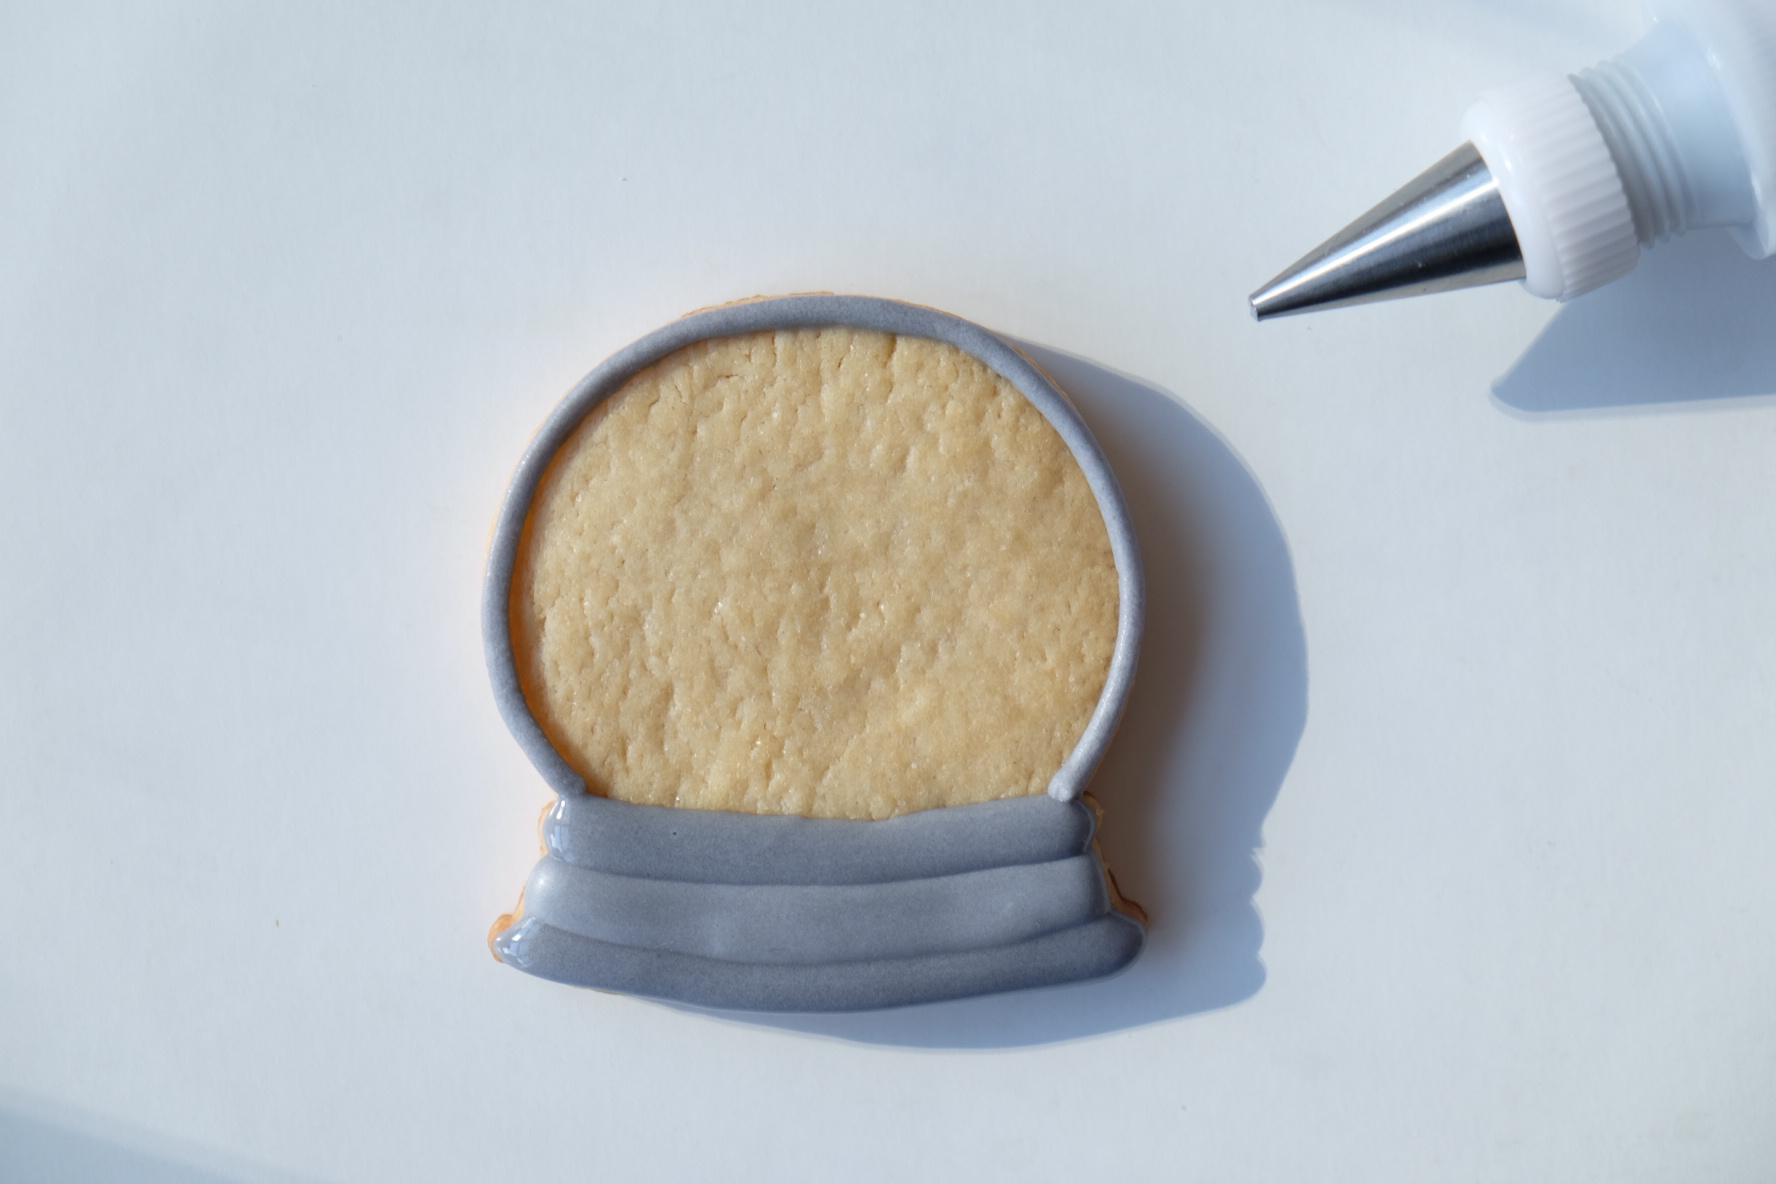
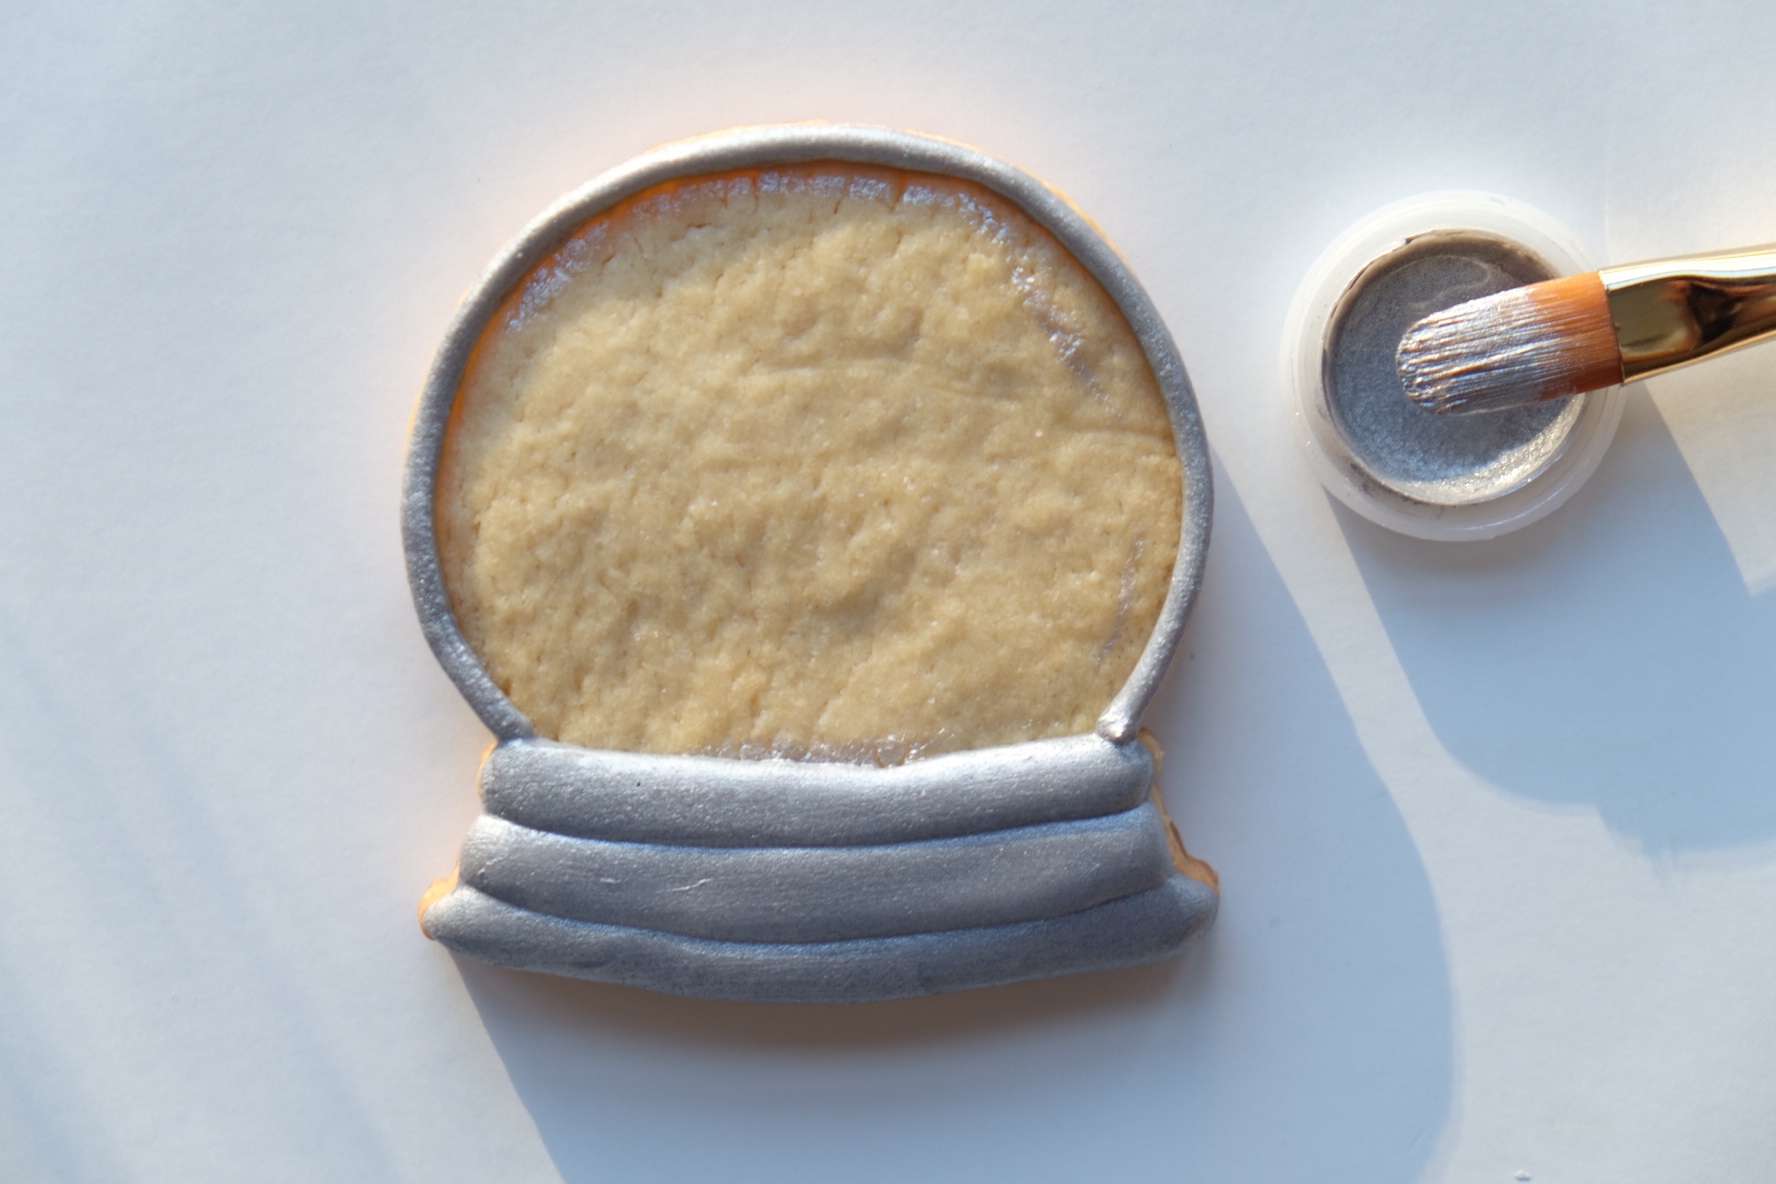
7. Allow to dry for 10-15 minutes, paint all silver details.
8. Fill your tracks with black icing.

9. Set aside to dry 18-24 hours
10. Once your toast and toaster are nice and dry, add your toaster’s face and pipe on your message.
TKT Tips and Reminders
Be sure to place your cookies under a fan when indicated, since small pools of icing tend to crater under the weight of the crust that forms. The fan helps the entire bit dry quickly, giving it a more solid interior that can resist the weight of your crust.
If you have a steady hand and good eye, you can wait less time before adding details. Just beware that icing that isn’t dry all the way through is more delicate!
Drying times can always be speed up with your handy dandy fan.
Bright Ideas
Change the message to suit your punny needs, ex: You’re the Butter to My Jam and then add butter to one toast cookie and jam to the other!
Want your butter to look like its melting? Add a” butter halo” by using a wet on wet technique and adding yellow flood right after you flood your toast cookie. Don’t want a melty pad of butter on your toast? Shmear it on just like you did to your knife